Biggy Chat (IA)
The Biggy Chat module allows you to have a conversation with Biggy right within the web app.
Within the Biggy Chat page, you can ask Biggy a question, ask it to generate a diagram, or upload images, CSVs, or Word documents for Biggy to analyze in real time.
Type your query into the Biggy web chat, or select the Microphone icon to use the voice-to-text option.
The Chat module works well for searching and asking questions, with advanced chat and response types to choose from.
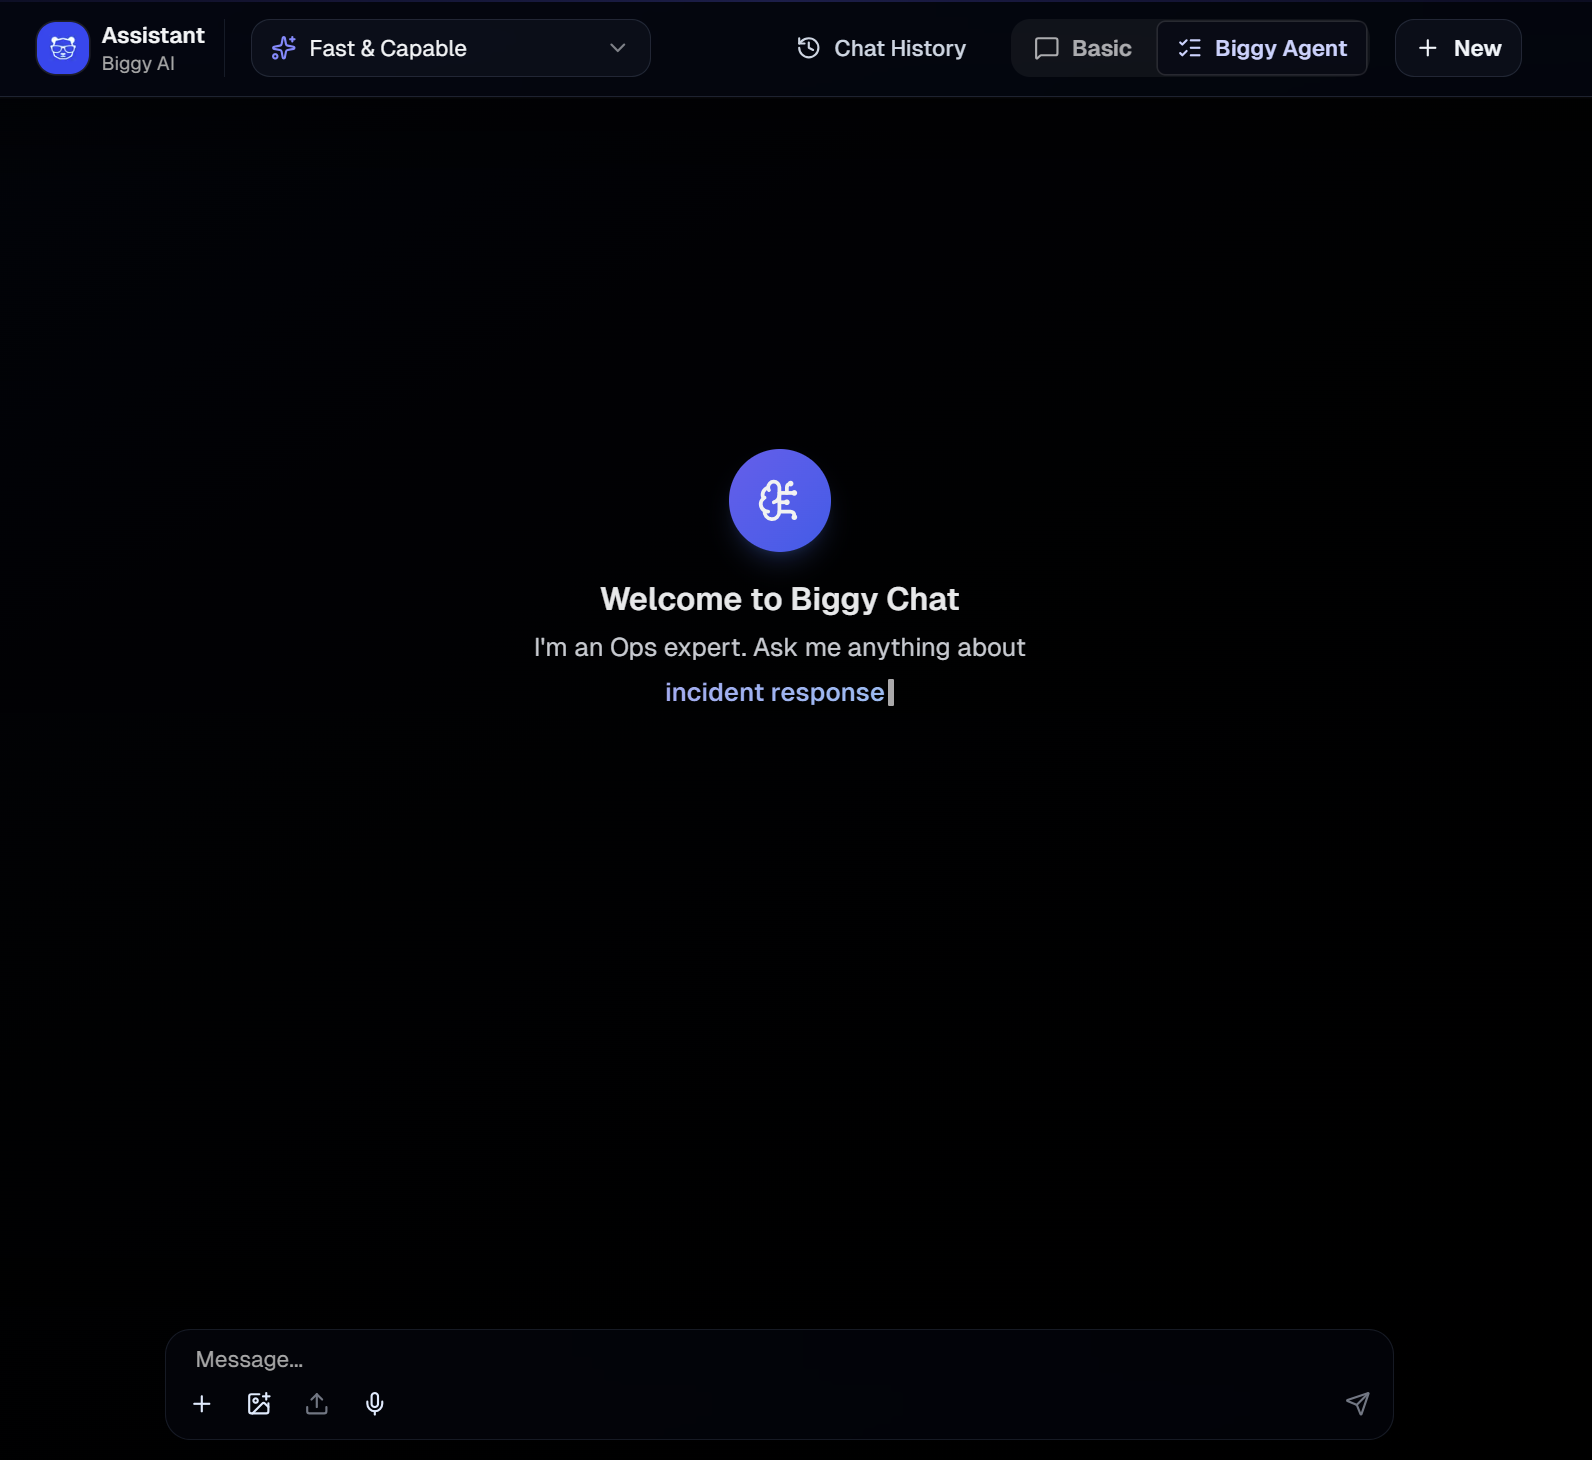
Biggy Chat
There are two web chat types available. At the top right of the Chat screen, select one of the following chat types:
Basic - A standard chat experience with an ITOps-oriented model. Use this option to ask general questions and analyze documents.
Biggy Agent - Can use integrations, full organizational context, and action plans to answer queries. This chat type can access multiple action plans within the same query.
Response styles inform how Biggy answers your query. At the top left of the Chat screen, select one of the following response types from the drop-down menu:
Fast & Capable - Generates a fast, in-depth summary.
Extra Reasoning - Uses more reasoning than Fast & Capable. Takes a little longer to generate.
Max Reasoning - Uses the highest amount of reasoning and takes the longest amount of time to generate.
Long Context - Uses a high amount of reasoning to analyze large documents. This response type is only available when selecting the Basic chat type.
Chat Presets
Create chat presets for queries that you frequently use with the Biggy web chat. Use private presets for personal workflows, or public to share with your organization.
For example, if you ask for a report on a weekly basis, you can create a preset for that query so that you don't need to retype it each time.
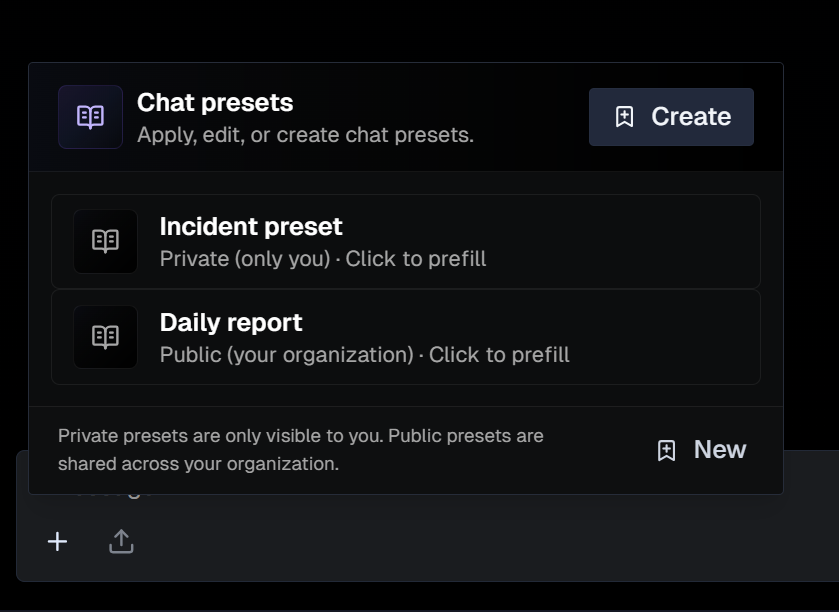
When interacting with the Biggy web chat, go to the bottom left corner and click the + button to select a preset from the list. The preset text will appear in the Biggy web chat text box.
Edit a preset
After you select a preset, you will have a chance to edit the content before you send the query.
For example, if you create a preset with placeholder names, you can edit those before sending the query to the Biggy web chat.
Create a Preset
To create a new preset:
In the Biggy web chat, go to the bottom left corner and click the + icon.
In the Chat Presets window, click Create or New.
In the Create Chat Presets window, populate the following:
Field
Description
Preset name
Descriptive name for the chat preset.
Visibility
Select who can see the preset. The following options are available:
Private - only visible to you.
Public - visible to everyone in your organization.
Preset Instructions
The query used in the preset.
Use the Generation Mode button to allow Biggy to generate a prompt based on your input.
Click Save Preset.
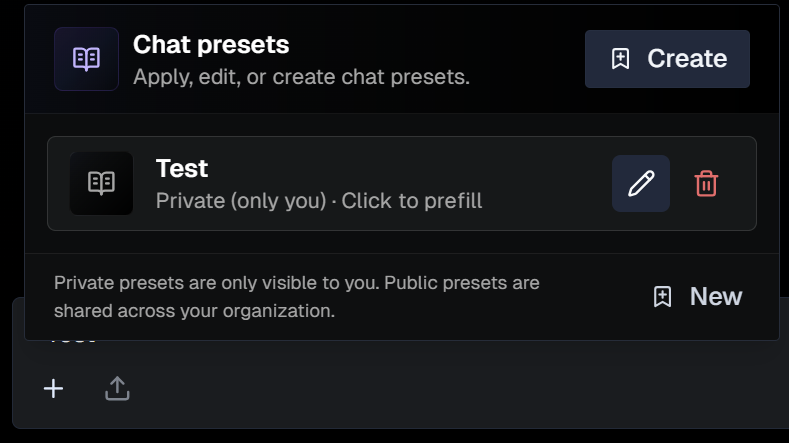
Manage Presets
To edit a preset, hover over it and click the Pencil icon. Adjust fields in the Edit Chat Preset screen, and click Save Changes.
To permanently delete a preset, hover over it and click the Trash can icon.
Share a Chat Message
You can send Biggy Chat messages to systems outside of the web app. Messages can be sent to:
Slack, Teams, and ServiceNow must be integrated with AI Incident Assistant to appear as a sharing option. See the Manage AI Incident Assistant Integrations documentation for more information.
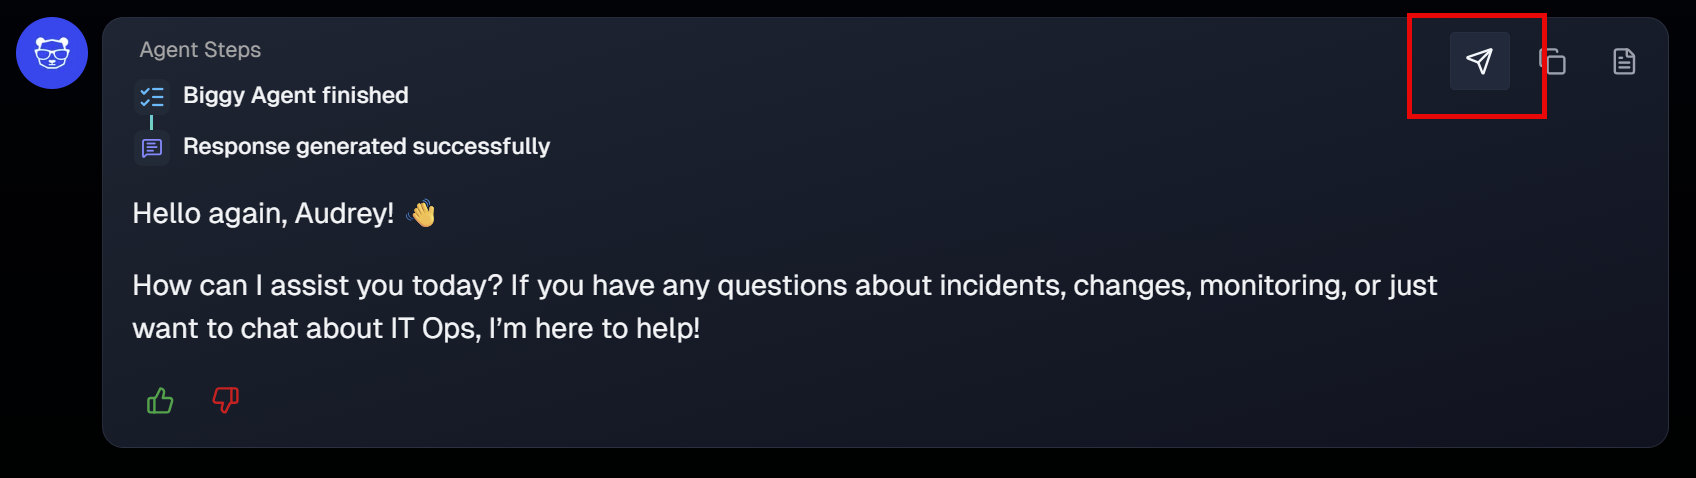
Copy or Download Messages
You can copy or download a Word document of any message in the web chat conversation. Hover over a message and click the Copy icon or the Download icon.
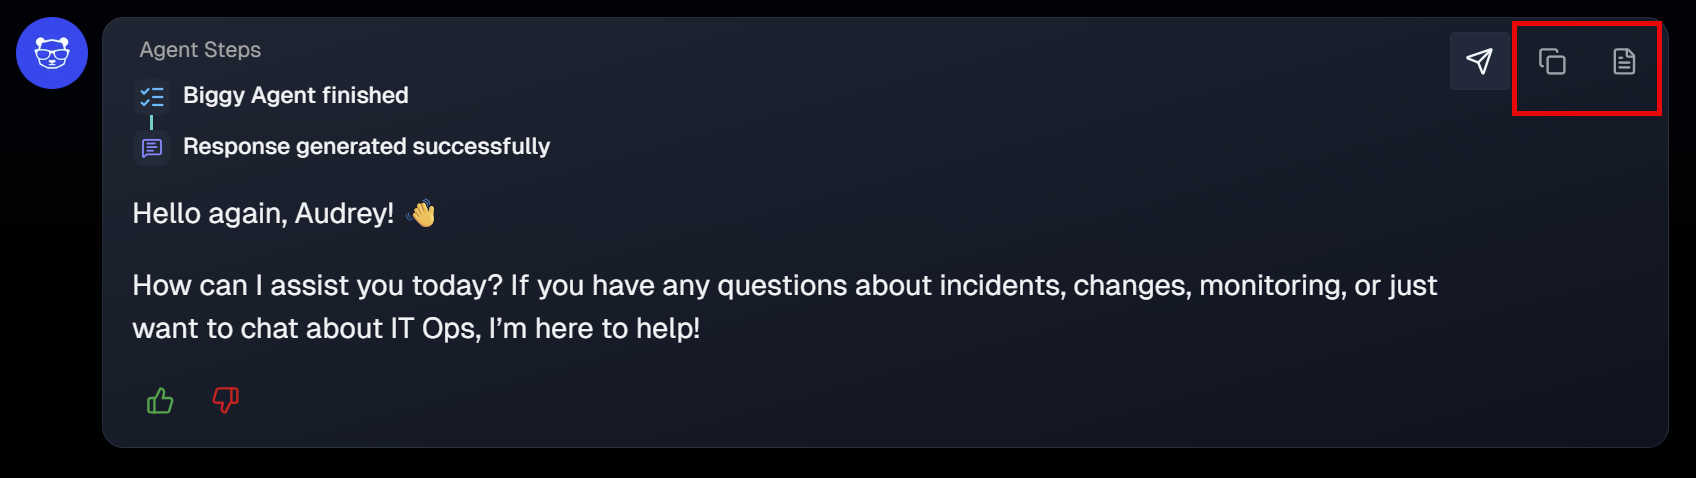
Tables
If Biggy generates a table as part of the response, you can select Download as CSV to export the table.
Chat History
To view recent Biggy Agent web chat conversations, select Chat History.
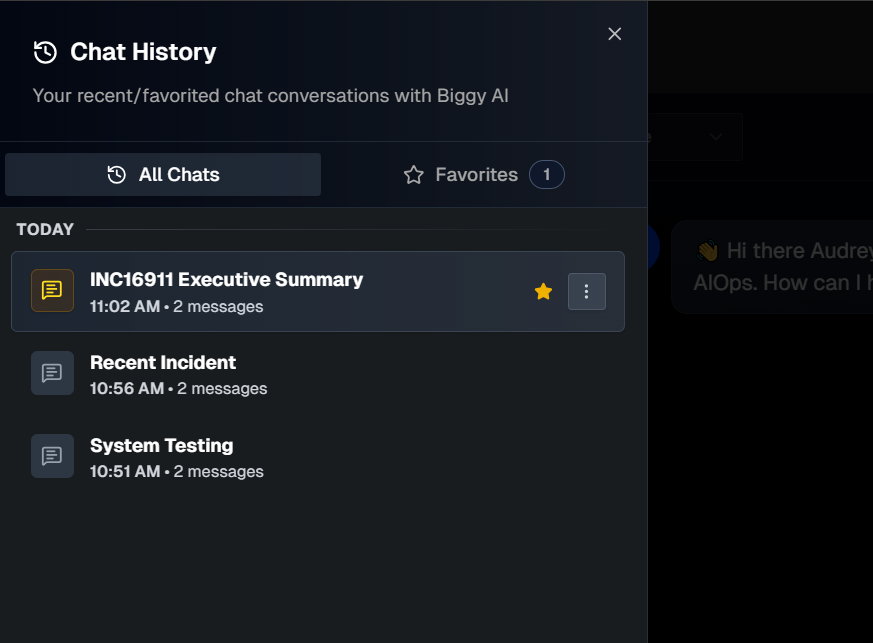
The All Chats tab automatically opens. Click any chat to open the full conversation.
If there's a conversation you'd like to save for easy access, click the Star icon to add it to the Favorites tab.
Biggy automatically generates a title for each conversation. To change the title, click the three dots icon and select Rename. Enter a new title and click the green check mark to save.
To permanently delete a conversation, click the three dots icon and select Delete.