Context and Data (IA and IP)
The Context and Data module in the AI Incident Assistant web app allows you to manage indexing settings, data, and documents. Choose the Biggy-generated content to automatically index, view your indexed data categories, and upload documents to provide additional context to Biggy.
Key Features
Adjust indexing settings to control which Biggy generated artifacts can be searched by users.
View the number of documents and last indexed data for each indexed data category.
Upload documents to give Biggy additional context.
Indexing Settings
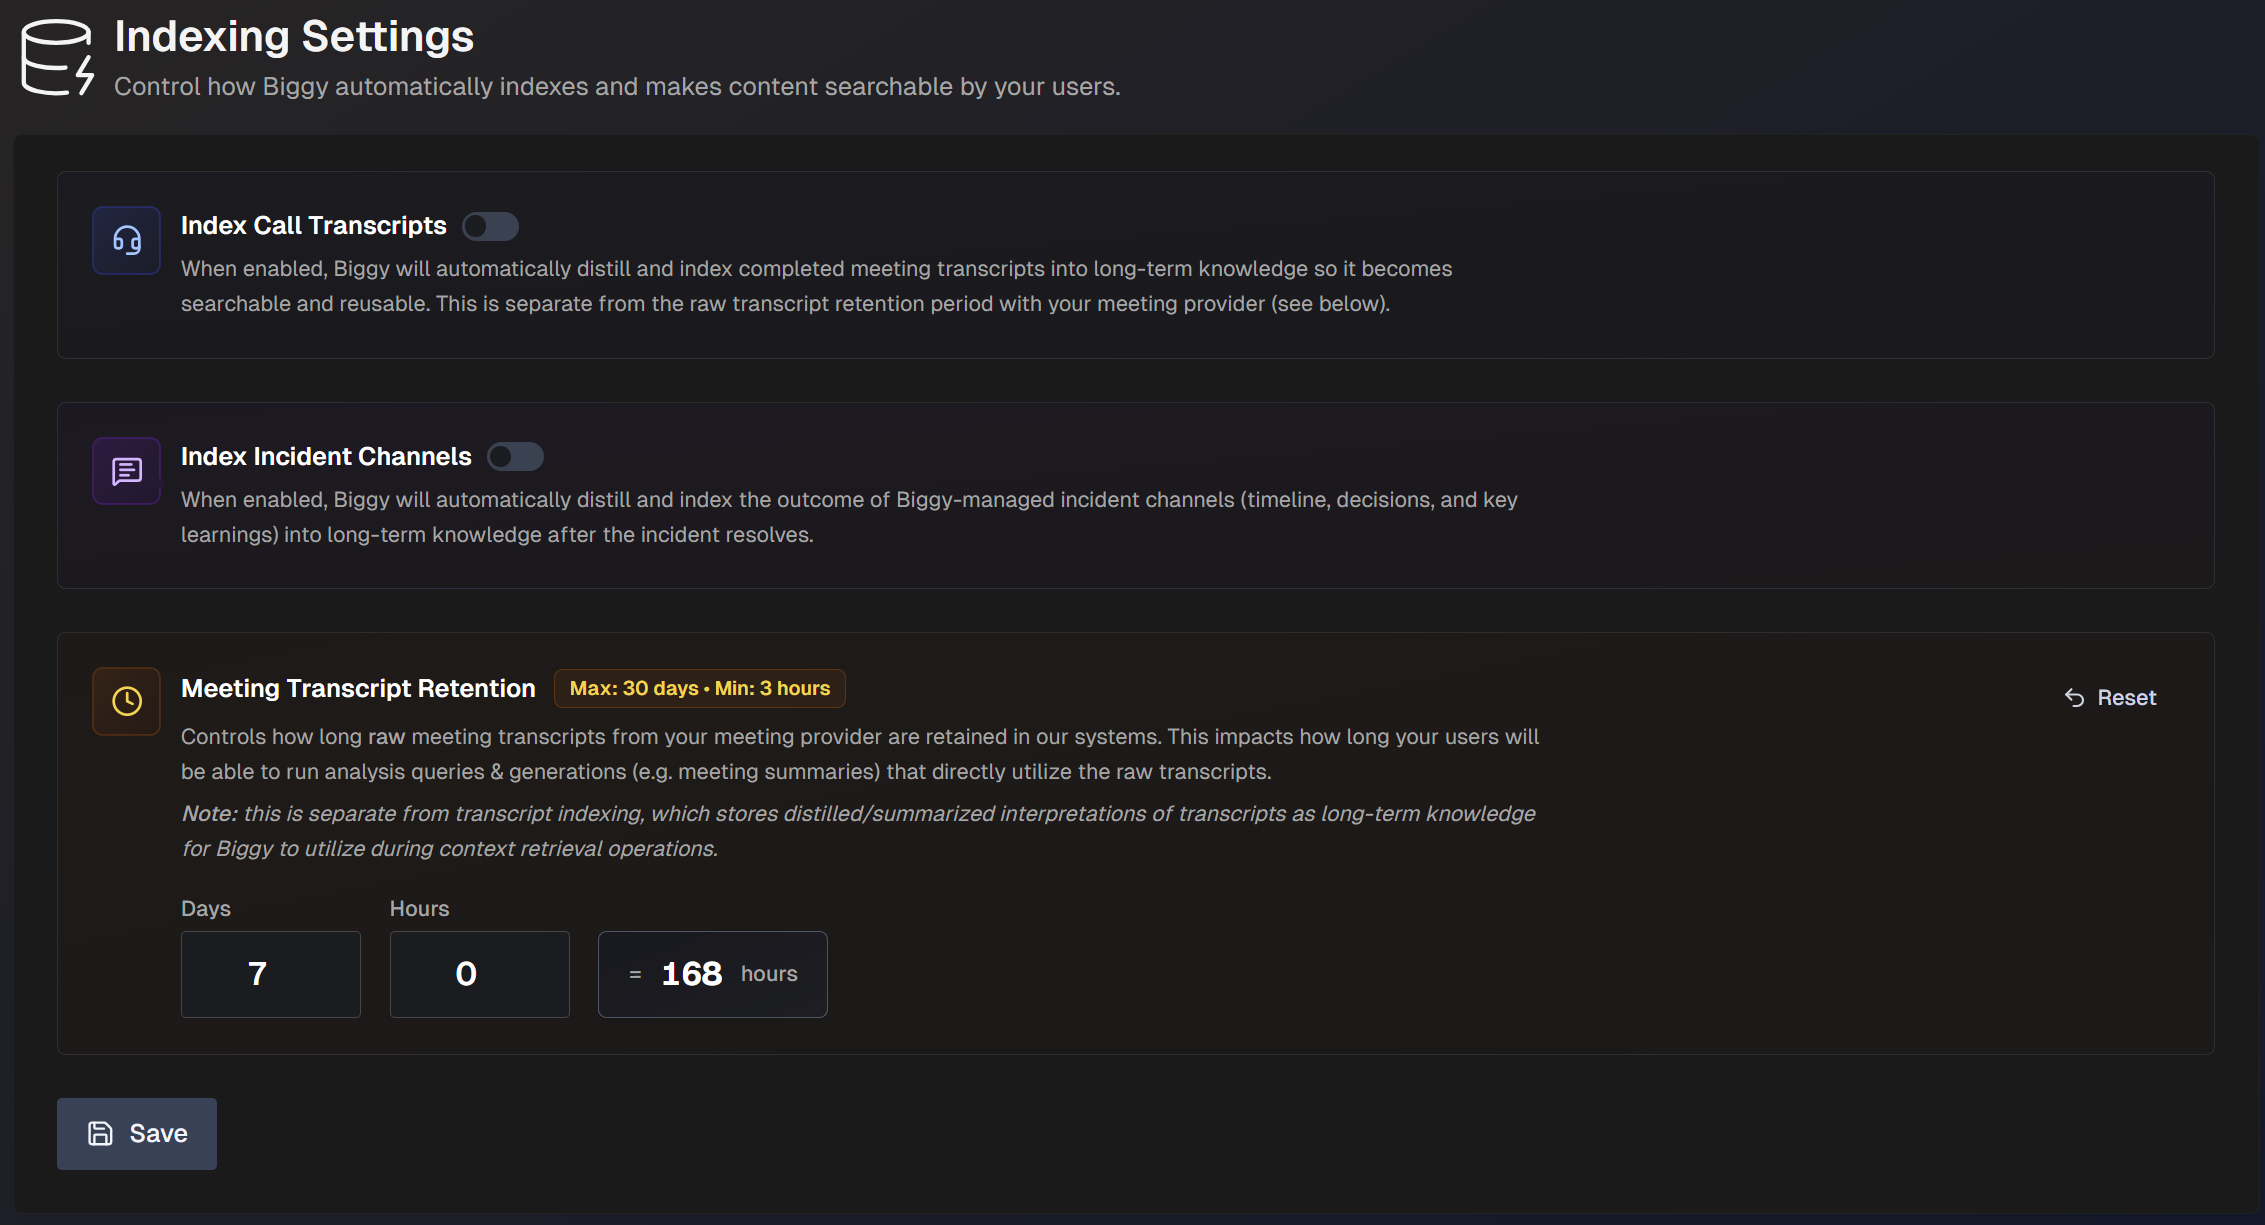
The Biggy Indexing Settings allow you to control which content is automatically indexed and searchable by your users.
The Indexing Settings page is divided into three tabs:
General
Chat Indexing
Web Indexing
General
The following general indexing settings are available:
Setting | Description |
|---|---|
Index Call Transcripts | Automatically distill and index completed meeting transcripts into Biggy's long-term knowledge, making them searchable and reusable. Note: This is separate from the Meeting Transcript Retention settings. |
Index Incident Channels | Automatically index Biggy managed incident channels upon incident resolution. |
Index Major Incidents | Automatically index completed Major Incidents including incident details, action outputs, communication context, and resolution outcomes into Biggy's long-term knowledge. |
Meeting Transcript Retention | Controls how long raw meeting transcripts from your meeting provider are retained. This impacts how long users can run queries and generate content, such as summaries, that directly use the raw transcripts. The maximum retention period is 30 days. The minimum is 3 hours. Note: This is separate from the Index Call Transcripts setting, which stores summarized interpretations of transcripts as long-term knowledge for Biggy to use during context retrieval. |
Chat Indexing
Use Chat Indexing to capture and index Slack and Teams conversations into searchable knowledge for AI-powered retrieval.
Toggle Chat Message Indexing on to enable this feature.
After enabling, click +Add Channels to add Slack or Teams channels for indexing. Select one or more channels from the list, or use the Search bar to find a specific channel.
Select How far back to index the selected channel(s) from the drop-down menu.
Web Indexing
Use Web Indexing to index publicly accessible pages such as documentation sites into Biggy's searchable knowledge.
Click + Add Web Source to add a new public URL. Populate the following information in the Add Web Source window:
URL - Public URL link.
Label (Optional) - Description of the URL.
Crawl Mode - Select Single to index only the URL included. Select Recursive to crawl the URL provided, and its subpages. If you select Recursive, choose the Max number of pages to crawl.
Sync Frequency - Select how often the web crawler should sync. You can select Manual, or choose a specific time frame. If you choose a time frame, use the Auto-sync toggle to determine whether the re-crawl will occur automatically on the selected schedule.
Manage Data
On the Manage Data page, you can view and explore your indexed and graph data.
The page is separated into the following tabs:
Data Counts
GraphDB Explorer
VectorDB Explorer
Data Counts
In the Data Counts tab, you can see an overview of your indexed documents across different source categories. Biggy uses indexed document data to fulfill user requests.
The Data Counts tab is divided into two sections:
Vector DB Counts - current indexed document totals, by source.
Graph DB Counts - current graph coverage for ITSM, CMDB, and tacit knowledge.
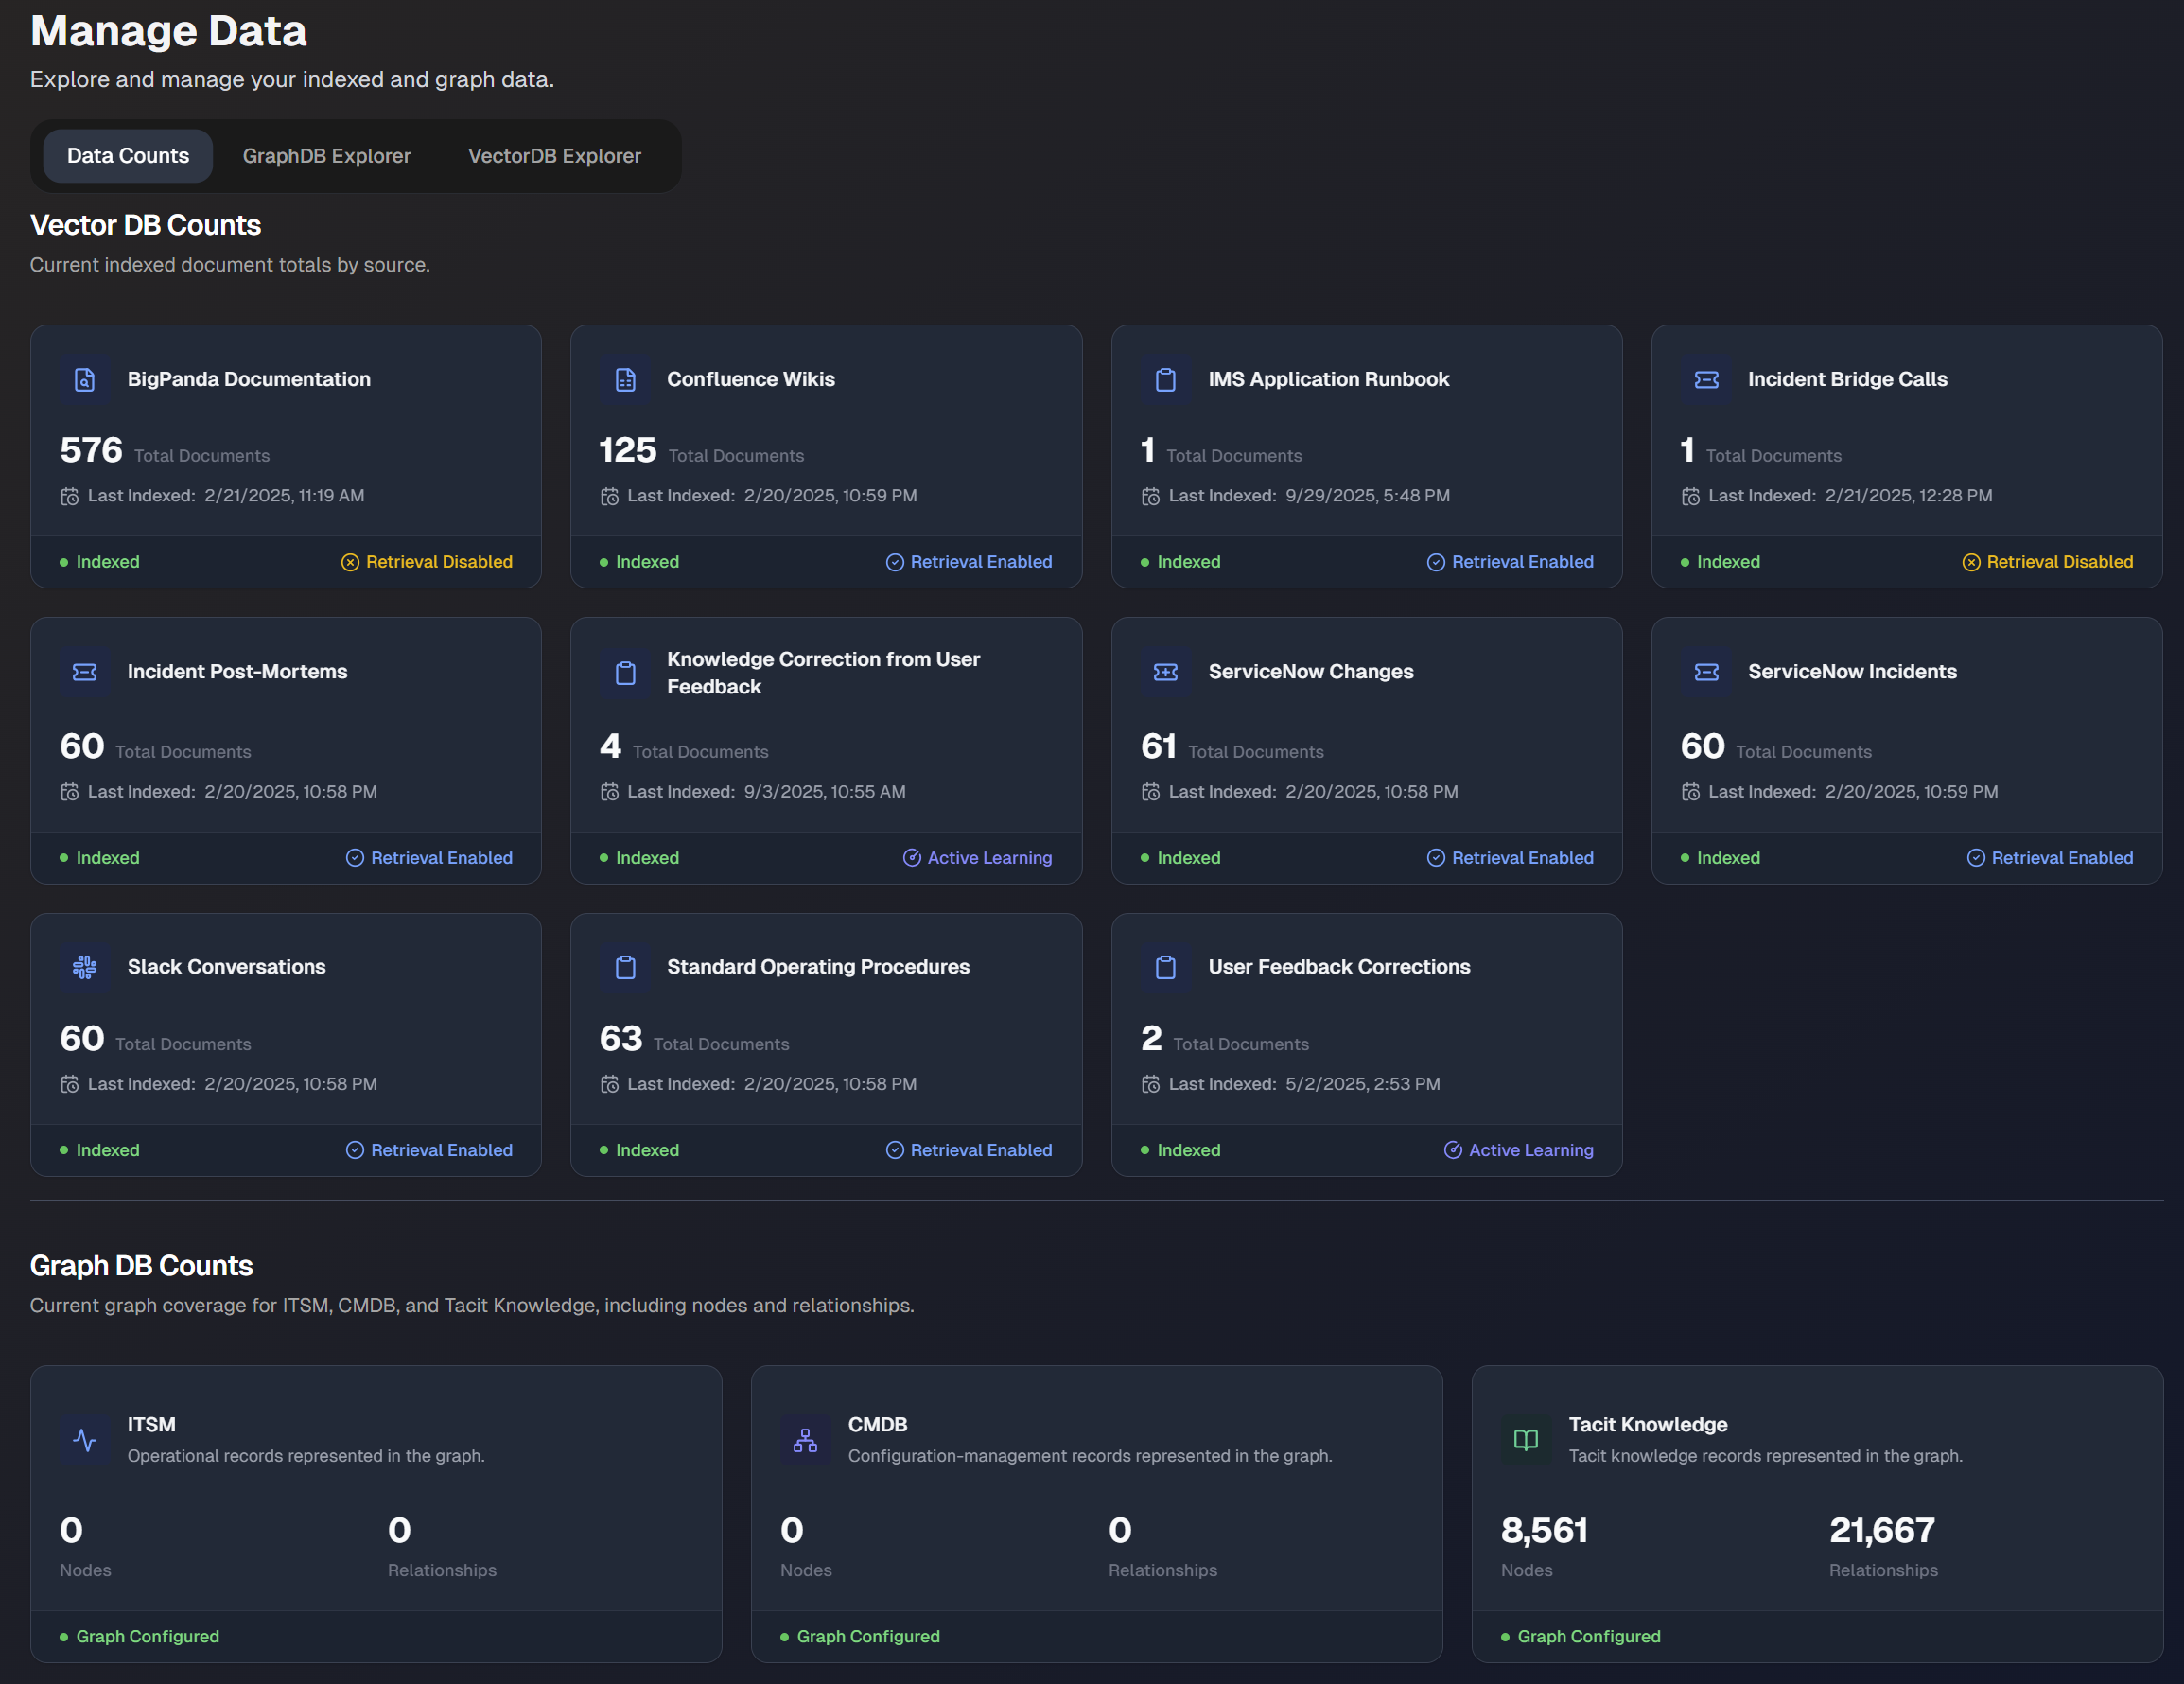
In the Vector DB Counts section, the following information is displayed for each data source:
Total number of documents
Last indexed date
Status (Retrieval enabled, retrieval disabled, or active learning)
In the Graph DB Counts section, the following information is displayed for each category:
Number of nodes
Number of relationships
Whether the graph is configured
GraphDB Explorer
The GraphDB Explorer tab provides a searchable visualization of your data. Type a keyword into the search box to find a specific document or data point. You can see all data or services that are related to or have interacted with the piece of data.
For example, you can search for the name of a specific user to see all of the incidents they have worked on.

Properties related to your search result appear in the right details pane. The Relevance Score shows how closely the document matched the searched keyword.
VectorDB Explorer
Use the VectorDB Explorer tab to search for specific indexed documents. Type a keyword into the search box to view matching documents. You can use the Source dropdown menu to filter by one of your data sources.
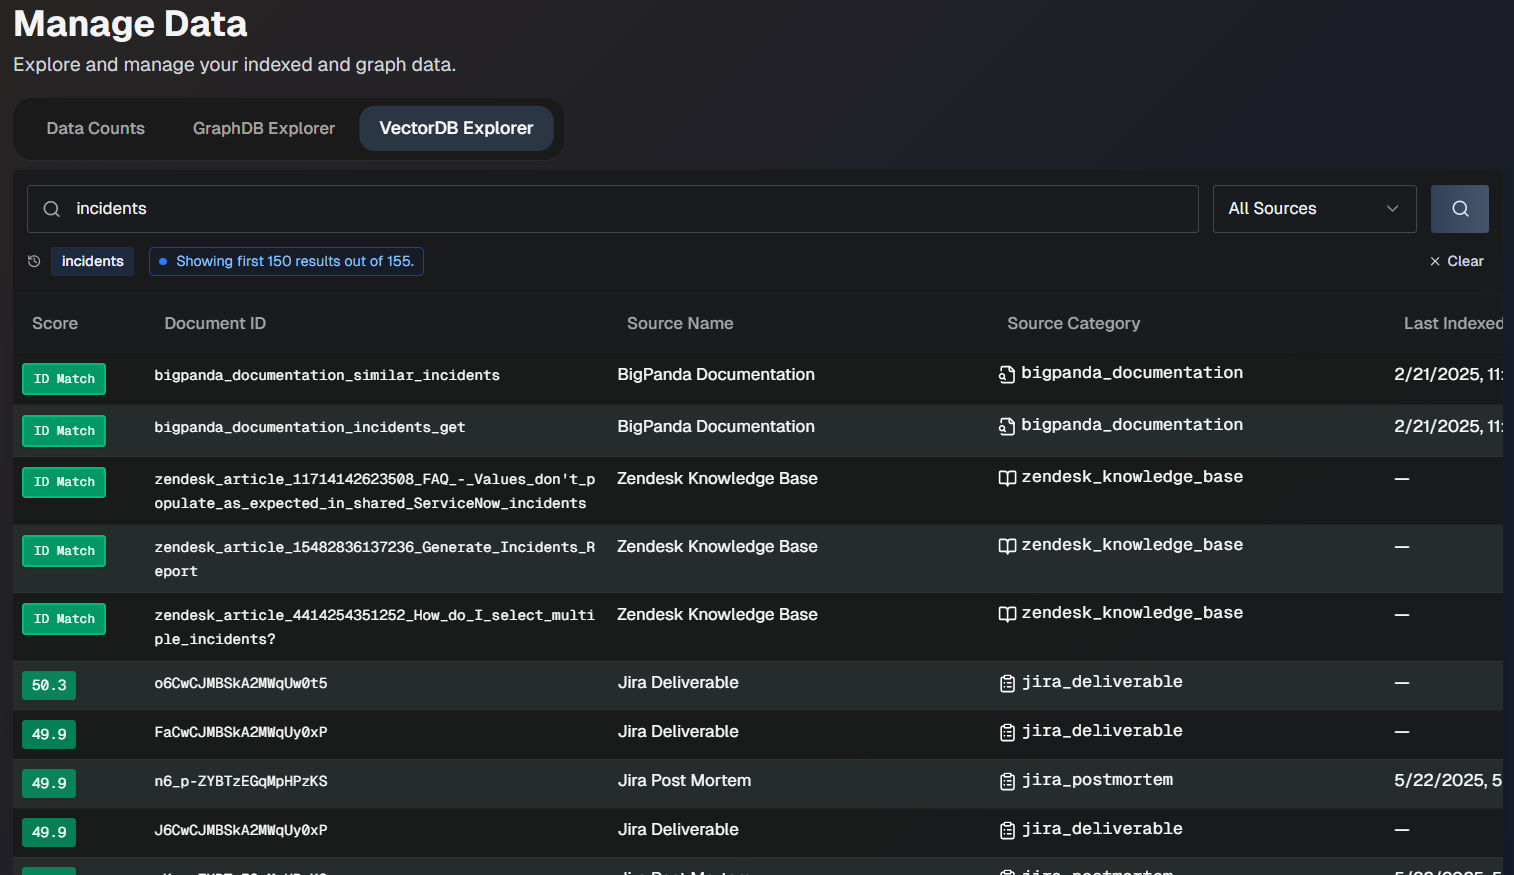
The following information for each document appears in the list:
Field | Description |
|---|---|
Score | Score of how closely the document matches the searched keyword. |
Document ID | Unique ID of the document. |
Source Name | The name of the source the document was ingested from. |
Source Category | The data category that the source is part of. |
Last Indexed | The date and time when the document was last indexed. |
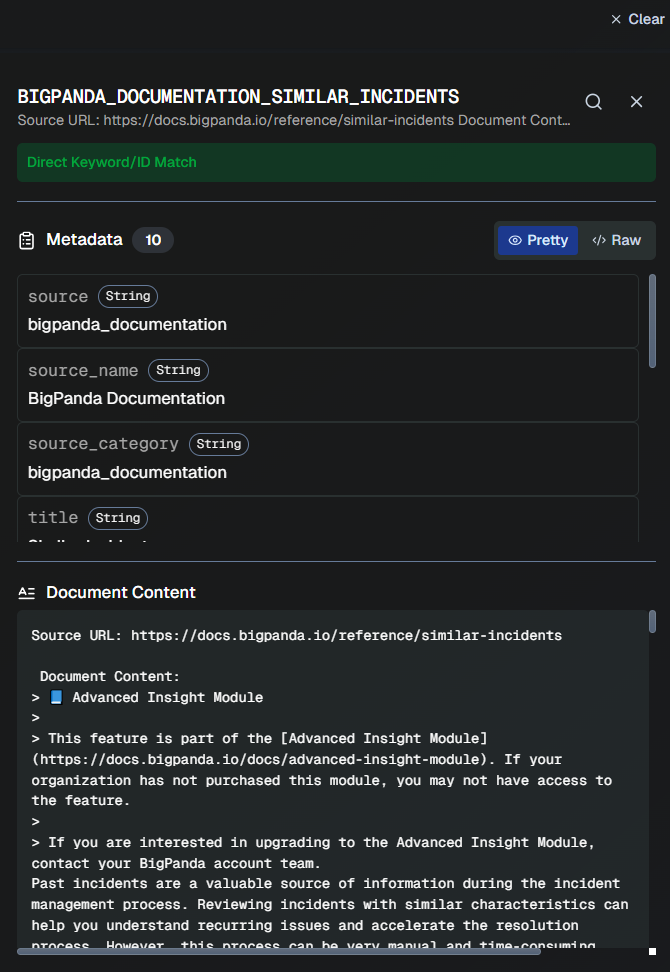
Click any document in the list to view additional details, including metadata and the full document content.
Upload Documents
To give AI Incident Assistant additional information and context, you can upload documents from ServiceNow or general file types such as runbooks, knowledge base articles, SOPs, Wikis, etc. Biggy will automatically add content from supported file types to its knowledge base.
See Export Data for instructions on exporting from some of the most common platforms.
To add documents, go to Configuration > Upload Documents.
On this screen, select the General, ServiceNow, or File Transfer tab, depending on the file type you'd like to upload.
Upload ServiceNow Exports
In the ServiceNow tab, you can upload and manage ServiceNow exports for your organization.
Supported format
Only incident (INC), problem (PRB), change (CHG), or knowledge base (KB) CSV exports from ServiceNow are supported. The file format must match what is exported from ServiceNow.
Select Upload ServiceNow Files to add a new file. You can upload 20 files at a time, with a maximum size of 5GB per file.
The following information about each uploaded file appears on the screen:
File name
Prefix
Type
Size
Uploaded by
Uploaded at
Status
To find a specific file, use the Search box.
If a file is no longer relevant, you can delete it by clicking the trash can icon. This will send a request to the BigPanda team to delete the item from Biggy's context.
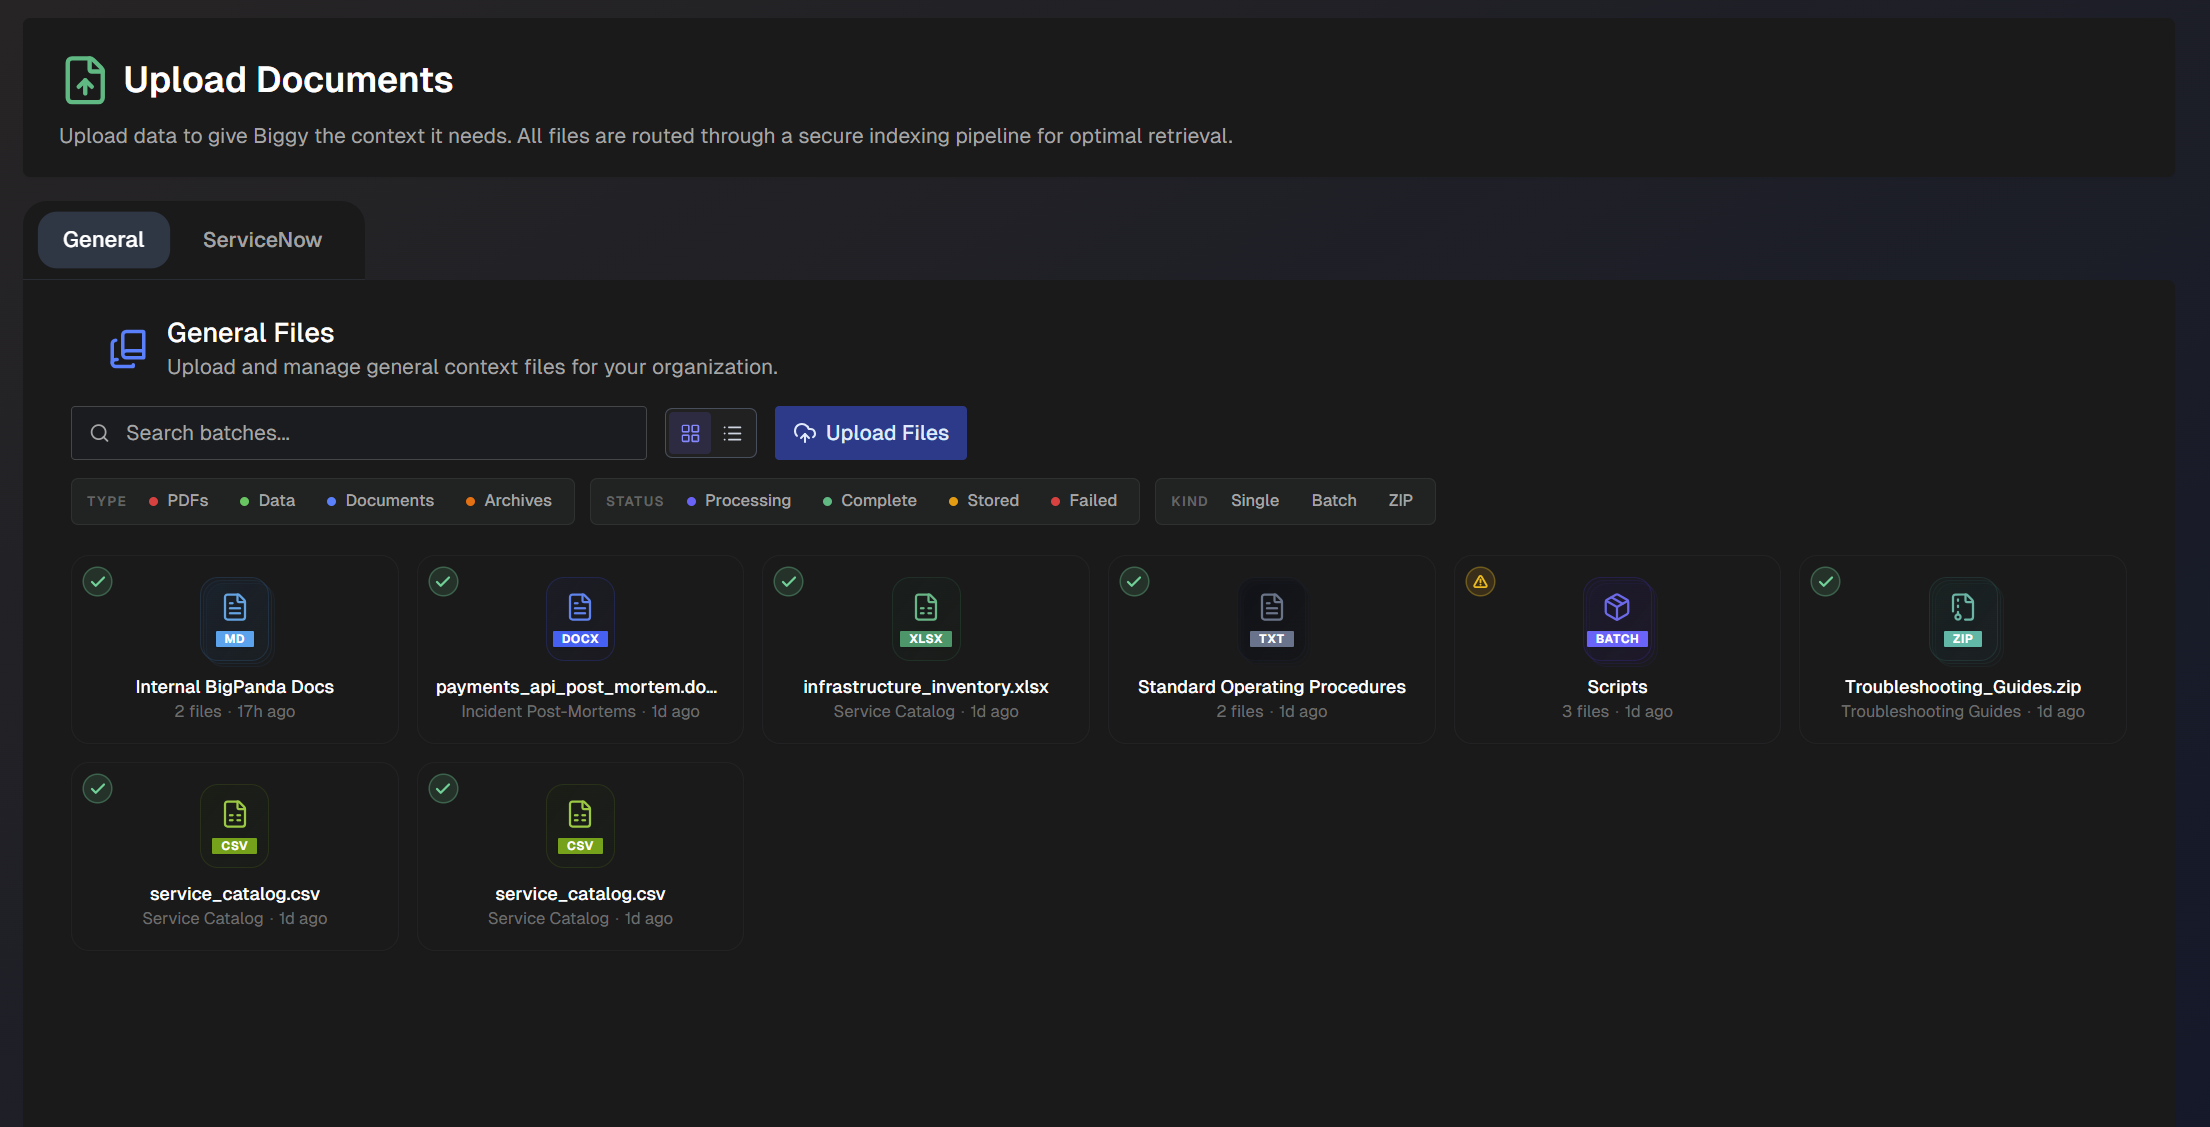
Upload General Documents
You can upload documents such as runbooks, knowledge base articles, SOPs, Wikis, etc. to give Biggy additional information and context.
Common file types such as PDF, spreadsheets, docs, slides, images, code files, and compressed files are supported.
Click Upload File to add a new file. The size limit for a file is 5GB. You can upload up to 5 files at a time. Files larger than 500 MB should be uploaded one at a time.
The following information about each uploaded file appears on the screen:
File Name
Type
Size
Uploaded By
Uploaded At
To find a specific file, use the Search box.
If a file is no longer relevant, you can delete it by clicking the trash can icon. This will send a request to the BigPanda team to delete the item from Biggy's context.
Export Data
Instructions for exporting data from some of the most widely used platforms are available in the links below:
ServiceNow Data Export
If you have ITIL or ITIL read_only access to your ServiceNow instance, use the URL below to export relevant ServiceNow tables with all records:
https://<instance>.service-now.com/<table>_list.do?CSV&sysparm_default_export_fields=all
Replace the fields in brackets with your instance name and the table you'd like to export.
You can export any default or custom table. The most commonly exported tables for Biggy are incident, problem, change_request, task, change_task, kb_knowledge, and cmdb_ci_appl.
If you'd like to limit the records included in the export, you can use an encoded query. Use the URL below to include an encoded query:
https://<instance>.service-now.com/<table>_list.do?CSV&sysparm_query=<encoded_query>&sysparm_default_export_fields=all
You can build the encoded query in the ServiceNow UI and then replace the <encoded_query> field in the URL.
Next Steps
Get a high-level overview of how Biggy works in the AI Incident Assistant documentation.
Learn how operators can Manage Incidents with AI Incident Assistant.